Published
Moving Raspberry Pi SD Cards
Transfer your Raspberry Pi SD card to a new one with ease
Recently I needed to upgrade the size of the SD card in one of my Raspberry Pis for a project I have been working on (more on that in a future blog post!). Here is a quick rundown on how to move between SD cards without losing anything. This will work on Linux and might work on MacOS and Windows Subsystem for Linux (WSL).
Table of contents
Find the SD Card
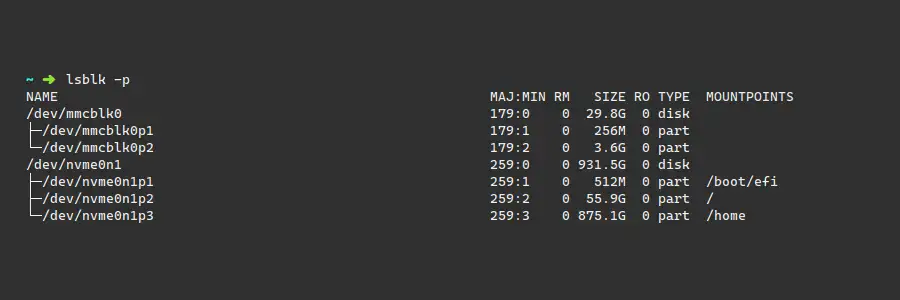
After inserting the SD card into a computer, run lsblk -p to find the device
ID of the SD card. Usually, this looks something like /dev/mmcblk0. Be sure to
select the root of the SD card, not the partition (for example, /dev/mmcblk0p1).
Clone the SD Card
Now that you know the device ID, you can copy the SD card into a file. The resulting file will be the same size as the SD card, so make sure you have enough storage space on your computer.
Run sudo dd bs=4M if=<device id from lsblk> of=<path to store image> conv=fsync
to copy the card. For example:
sudo dd bs=4M if=/dev/mmcblk0 of=~/path/to/storage/rpi.img conv=fsync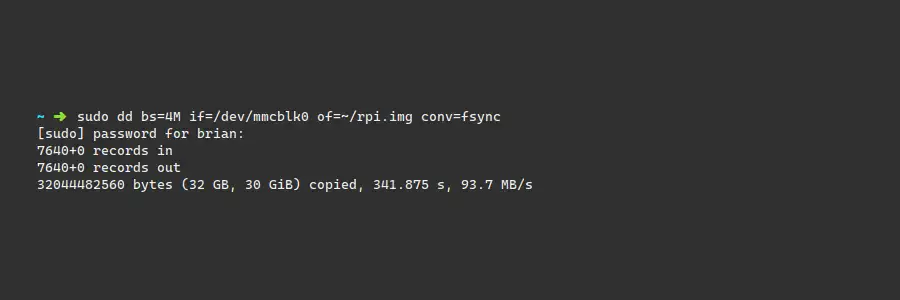
Shrink the SD Card
The image that was just copied to your computer is the same size as the SD card, regardless of the actual contents inside the SD card. This is where the PiShrink script comes in handy.
Download the script: wget https://raw.githubusercontent.com/Drewsif/PiShrink/master/pishrink.sh
(or use another method to download it).
Make sure the script is executable: chmod +x pishrink.sh.
Then run the script by supplying the image you just cloned and a destination
to output the resulting smaller image: ./pishrink.sh /path/to/input.img /path/to/output.img
The beauty of the script is that it will shrink the size of the cloned image and also set the image to auto-expand on the next boot of the image. That way you can get a bigger SD card and automatically use all the space on the card.
If you want to compress the image into a gzip or xz file, pass the -z or -Z
flags to PiShrink.
Advertisement
Continue reading below
Copy to a new SD Card
You can now copy the shrunk image file to a new SD card using the dd command
or the popular Etcher GUI tool.
Example dd command (replace /dev/mmcblk0 with your SD card): sudo dd bs=4M if=/path/to/output.img of=/dev/mmcblk0
Now the next time you boot your Raspberry Pi it will automatically expand to the full size of the SD card without any data loss.
Further Resources
- rpilocator - Find a Raspberry Pi in stock
- Adafruit - My preferred vendor for buying a Raspberry Pi
- SD Cards I’ve used with success
- PiShrink script by Drew Bonasera
- Etcher - Image flashing tool
- DD manpage