Updated
Published
Self-Hosted device tracking with OwnTracks
Be in control of your own location data with OwnTracks!
OwnTracks is a location-tracking app for both Android and iOS. OwnTracks is an open-source alternative to the popular Life360 app. While the OwnTracks app can be used on its own, setting up an OwnTracks server offers additional benefits, such as the ability to share your location with others and having complete control over your data. In this blog post, I will walk you through the process of setting up your own, private, OwnTracks server. This fits in nicely with the Docker Compose that I have discussed previously. While this guide assumes some knowledge of using Docker Compose, it will take you through the process step-by-step and help you get your own OwnTracks server up and running quickly. So, let’s get started!
Advertisement
Continue reading below
Table of contents
- Prerequisites
- Setting Up the OwnTracks Server
- Make OwnTracks Accessible from the Internet
- Setting Up the App
- Android
- iOS
- Verify it Works
- Allow Friends Access
- Pretty Images on the Map
- GitHub Avatar
- Gravatar
- Local Image
- Put the Cards on the Server
- Conclusion
- Resources
Prerequisites
You must have a server running that you can easily access. I personally run Ubuntu Server.
You must have Docker setup
as well as Docker Compose.
For easy access to the docker compose command, add this alias to your ~/.bashrc
file: alias dc='docker compose'. Then you can type dc rather than docker compose.
Setting Up the OwnTracks Server
Setup a docker-compose.yml file on your server:
version: "3.6"
services:
  owntracks-recorder:
    container_name: owntracks-recorder
    image: owntracks/recorder
    ports:
      - 8083:8083
    environment:
      - OTR_PORT=0 # disables MQTT
    volumes:
      - /etc/localtime:/etc/localtime:ro
      - ./owntracks-recorder/config:/config
      - ./owntracks-recorder/store:/store
    restart: unless-stopped
For simplicity, I have disabled MQTT support and instead run everything over HTTP.
Start the OwnTracks Recorder server with the command docker compose up. The
server will be listening on your server’s IP address at port 8083. You can
view the basic interface by going to http://<server-ip>:8083 in your browser.
Advertisement
Continue reading below
Make OwnTracks Accessible from the Internet
Now that you have a working OwnTracks Recorder you can access it from your local network. But that does not do you any good if you want to track your journeys outside your LAN. In order to be able to update your location on the go, you need to put the Recorder behind a reverse proxy.
There are several options for doing this, like Nginx and Caddy. My current setup uses Traefik so I’ll detail that below. No matter what reverse proxy you decide to use, you must protect your OwnTracks Recorder with authentication. By itself, the Recorder does not provide any authentication.
Add the following to your docker-compose.yml as part of the owntracks-recorder
service:
    labels:
      - traefik.enable=true
      - traefik.http.routers.owntracks.rule=Host(`owntracks.your-domain.com`) # Set this to your prefered domain
      - traefik.http.routers.owntracks.entrypoints=websecure
      - traefik.http.routers.owntracks.tls.certresolver=cloudflare # Only needed if you use Cloudflare for certificates
      - traefik.http.services.owntracks.loadbalancer.server.port=8083
      - traefik.http.routers.owntracks.middlewares=owntracks-auth # Enable basic auth
      - "traefik.http.middlewares.owntracks-auth.basicauth.users=test:$$apr1$$H6uskkkW$$IgXLP6ewTrSuBkTrqE8wj/,test2:$$apr1$$d9hr9HBB$$4HxwgUir3HP4EsggP/QNo0"
You will need to setup your users as part of the last line by using the htpasswd command.
The Traefik docs
recommends running it like:
echo $(htpasswd -nB YOUR_USER_NAME) | sed -e s/\\$/\\$\\$/g`.This makes sure it is in the proper format. You can add as many users as you like to the label, just separate them each with a comma.
This setup assumes you already have a Traefik container running as part of your
docker-compose.yml file. To get started with Traefik, check out their
getting started guide.
If you are using Nginx, check out this tutorial on setting up Basic auth. Or if you are using Caddy, use this Basic auth tutorial.
Setting Up the App
Android
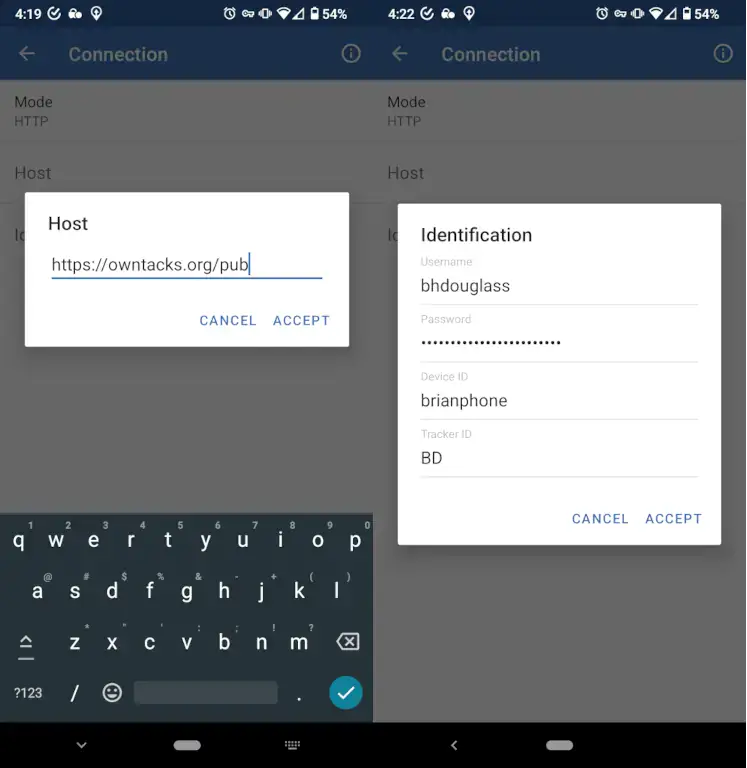
Once you download the Android app from Google Play you can easily get set up with your new OwnTracks server. Head into the menu and enter the “Preferences” screen.
Tap to edit “Connection” and select HTTP as the “Mode.” For the “Host” section you can put in https://<your domain>/pub.
For the “Identification” the username and password need to match the basic auth credentials that you set on your reverse proxy. The “Device ID” should be something unique to the device (no spaces allowed). Be sure to remember it later if you want to set up friends. The “Tracker ID” is a two-character identifier that will show up on the map for you and your friends.
iOS
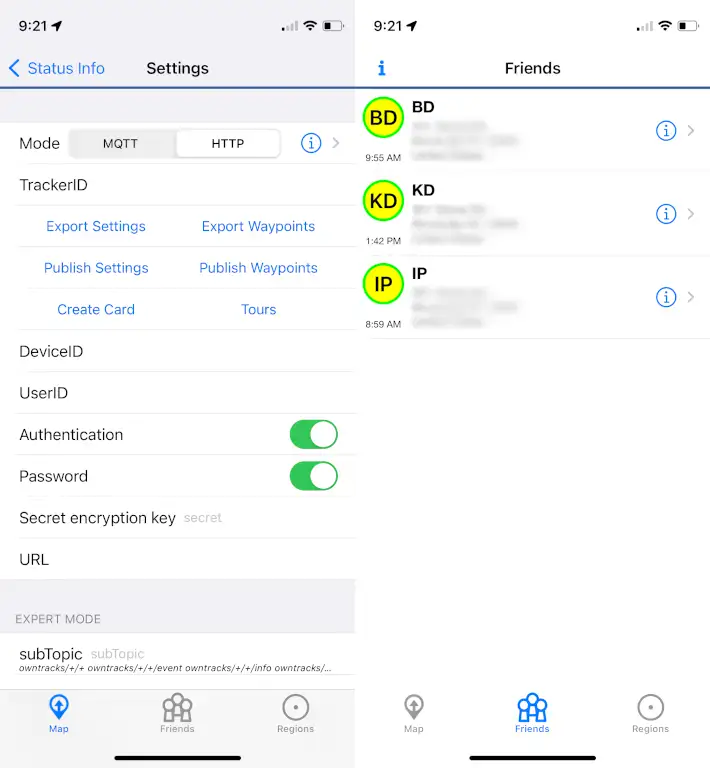
Once you download the iOS app from the App Store you can easily get set up with your new OwnTracks server. Head into the menu and enter the “Settings” screen.
Choose HTTP as the “Mode” and enter the two-character identifier for the “Tracker ID.” The “Tracker ID” will show up on the map for you and any friends.
Add the “Device ID” as something unique to the device (no spaces allowed). You will need this later when setting up friends. Then enter the “User ID” and “Password” to match the basic auth credentials that you set on your reverse proxy.
Finally, set the “URL” as https://<your domain>/pub.
Verify it Works
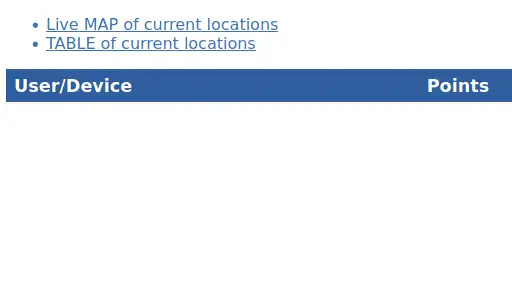
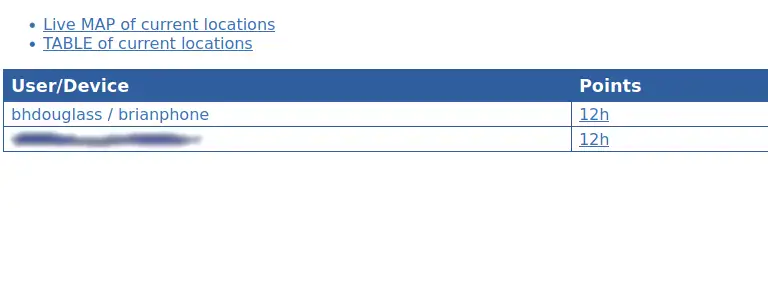
Now your device should be all set to communicate with your OwnTracks Recorder server. To verify that it is receiving data from your device, navigate to the web UI and enter your basic auth credentials. If you are not prompted for your basic auth credentials, revisit your reverse proxy settings.
You should see any devices registered both in the list and on the provided map.
Advertisement
Continue reading below
Allow Friends Access
Want to share your location data with a loved one or friends and stop using apps
like Life360? The setup process is a bit esoteric, but once set you shouldn’t
need to fuss with it. Create a file in ./owntracks-recorder/config (relative
to the docker-compose.yml) called friends.txt. Since this is part of the
container’s volumes we can edit it from the host and load it into the database
from inside the container.
The file should be formatted like this:
<username>-<device> ["<username>/<device>", "<friend-username>/<fiend-device>"]
<friend-username>-<friend-device> ["<username>/<device>", "<friend-username>/<fiend-device>"]
The format of the first part of each line is important and tripped me up when first setting up my own OwnTracks Recorder.
Enter the Docker container using:
docker compose exec owntracks-recorder shOnce at a shell in the container, run:
ocat --load=friends < /config/friends.txtThis loads the friends file into the database. Verify the friends were loaded by running:
ocat --dump=friendsNow you and your friends/family can view each other’s locations from within the app.
Pretty Images on the Map
Right now the map should only show the “Tracker ID” for each device being tracked. To make this look nicer, you need to set up a card for each user.
Advertisement
Continue reading below
GitHub Avatar
To use the avatar from a GitHub user, download github2card.py.
Set the script as executable (chmod +x github2card.py), then run:
github2card.py GITHUB_USERNAME > card.jsonGravatar
To use the avatar from Gravatar, download gravatar2card.sh.
Set the script as executable (chmod +x gravatar2card.sh), then run:
gravatar2card.sh GRAVATAR_EMAIL "FULL NAME" > card.jsonLocal Image
To use a local image, download image2card.sh.
Make sure you have the convert command installed from ImageMagic.
Set the script as executable (chmod +x image2card.sh), then run:
image2card.sh /path/to/file.webp "FULL NAME" > card.jsonPut the Cards on the Server
Once you have created a card.json file, you can put them on your server to
be served by OwnTracks Recorder. Store the files for each user in
./owntracks-recorder/store/cards/<username>/<username>.json.
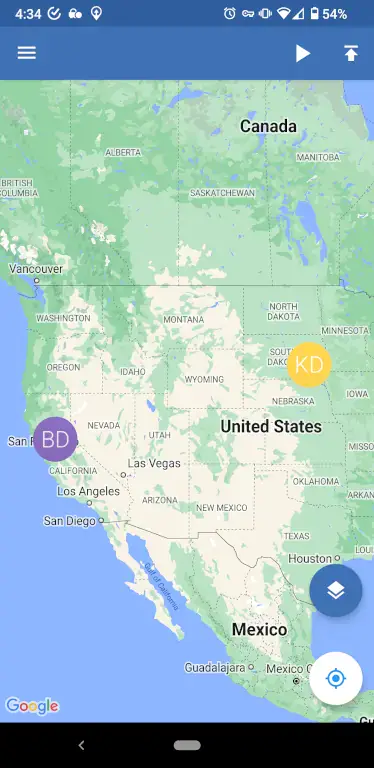
Now you can have nice images on your maps!
![]()
Advertisement
Continue reading below
Conclusion
In conclusion, setting up an OwnTracks server using Docker is a great way to get the most out of this GPS tracking app. With your own server, you can easily share your data with others and access it from multiple devices, all while maintaining control over your data. No longer do you need to entrust your location data to a third party. This step-by-step guide has covered everything you need to know to set up your own OwnTracks server, from creating the Docker Compose configuration to sharing it with your friends and family. I hope you found this tutorial useful and that you’re now ready to start using your own OwnTracks server!