Updated
Published
The Complete Guide to the Node.js Test Runner
Learn how to test JavaScript using the Node.js Test Runner
Node.js is a popular runtime environment for building server-side applications using JavaScript. Testing is an essential part of any software development process, and the release of Node.js 20 brings an exciting update for developers. Node.js 20 promotes the built-in Test Runner from experimental to stable.
In this tutorial, we’ll take a closer look at the now-stable Test Runner, from installation to running tests and generating reports.
So, let’s get started and see how you can use the Node.js Test Runner.
If you are interested in a practical application of this, check out my tutorial on testing an Express app with the Node Test Runner.
Table of Contents
- Getting Started with the Test Runner
- Writing Tests
- test()
- describe()
- it() vs test()
- Assertions
- Example Test
- Test Plans
- How Does Node Find Tests?
- Limiting the Tests
- TODO tests
- Test Timeouts
- Hooks
- Mocking
- Mocking Timers
- Mocking Dates
- Mocking Modules
- Test Reporters
- Watch Mode
- Test Concurrency
- Code Coverage
- Code Coverage Thresholds
- Command Line Flags
- Conclusion
- Further Reading
Getting Started with the Test Runner
To use the stable Test Runner you will need to download version 20 (or later) from nodejs.org or your favorite Node.js version manager. (Check out Volta!)
Now you can run tests by using the --test cli flag:
node --testWriting Tests
Before running the Test Runner, you will need to write some actual tests.
The essential test functions can be imported from the node:test module.
Note: There is no test module, you have to use node:test.
const { describe, test } = require('node:test');Advertisement
Continue reading below
test()
The test() function
sets up an individual test. The first argument is a descriptive name for the test.
The second argument is a function that performs the actual test.
The tested function can be either a normal function or an asynchronous function.
describe()
The describe() function
set ups up a suite of tests. A describe block can have many different tests inside
of it and is meant to group together related tests. A describe block can also
be used to set up and tear down tests using hooks.
The first argument to describe() is the name of the suite. The second argument
is a function that contains one or more test() functions.
it() vs test()
There is a shorthand for the test() function called it().
it() is simply an alias for test(), so it does exactly the same thing and takes
exactly the same parameters.
So then, why use one over the other?
The difference is readability, as a Stack Overflow answer
states. When using it(), the tendency is to read it as part of the test name.
So it('should do this thing') is read as: “It should do this thing”.
It really just comes down to personal preference. As long as you are consistent in your test files no one should complain too much.
Assertions
Now that you have tests you’ll want to make sure that your code produces expected
results. That is where the assert built-in module shines.
The assert module has many different types of asserts, but the one most commonly
used is the assert.equal() function.
As with most of the assert functions, assert.equal() takes two arguments,
the actual value and the expected value. There is also a third optional message.
assert.equal() will compare the actual and expected value and throws an error
if they are not equal. When using “strict mode” (recommend!) this will use strict
equality (===) rather than regular equality (==) in “legacy mode”.
To use assertions in your tests (in “strict mode”) use the following example.
const assert = require('node:assert/strict');
assert.equal(1, 1); // True
assert.equal(1, '1'); // False
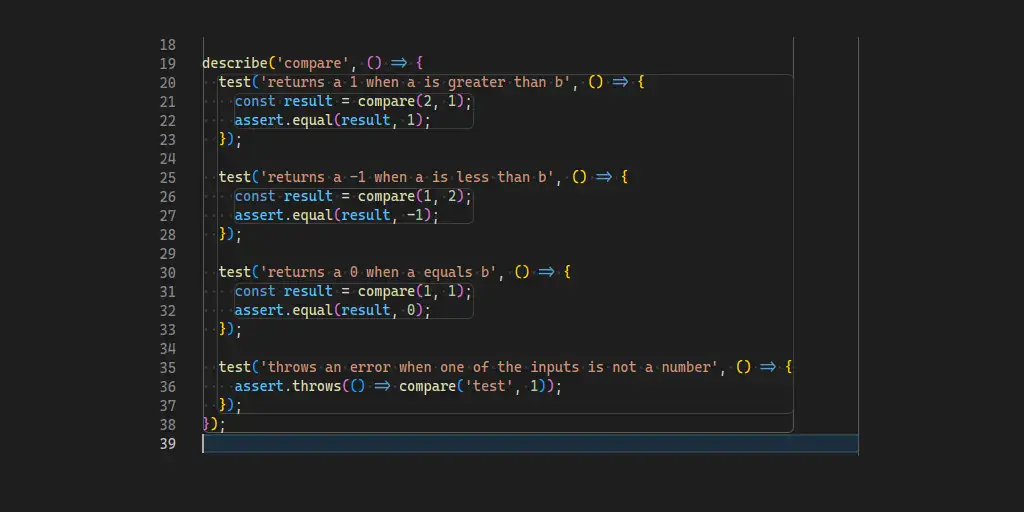
assert.equal(1, {}); // FalseExample Test
// example.test.js

const { describe, test } = require('node:test');
const assert = require('node:assert/strict');

// The function to test (normally this would be in a different file)
function compare(a, b) {
  if (typeof a !== 'number' || typeof b !== 'number') {
    throw new Error('Not a number');
  }

  if (a > b) {
    return 1;
  }
  else if (a < b) {
    return -1;
  }

  return 0;
}

// The test suite
describe('compare()', () => {
  test('Returns a 1 when a is greater than b', () => {
    const result = compare(2, 1);
    assert.equal(result, 1);
  });

  test('Returns a -1 when a is less than b', () => {
    const result = compare(1, 2);
    assert.equal(result, -1);
  });

  test('Returns a 0 when a equals b', () => {
    const result = compare(1, 1);
    assert.equal(result, 0);
  });

  test('Throws an error when one of the inputs is not a number', () => {
    assert.throws(() => compare('test', 1));
  });
});
Advertisement
Continue reading below
Test Plans
Node.js version 20.15.0 introduced test plans. Test plans are just letting Node know how many asserts you plan to call and how many sub tests you plan to run.
This is perfect for tests that require you to loop over a set of data.
In order to use this feature, you must use the assertions library passed in as part of the test context, rather than from
the assert module. For example:
// Using the compare function from the above example
test('Returns a 1 when a is greater than b', (context) => {
  context.plan(1); // We plan to call 1 assert function
  const result = compare(2, 1);

  // Calling the root `assert` here doesn't work with the test plan because they are in different contexts
  context.assert.equal(result, 1);
});
How Does Node Find Tests?
By default, the Test Runner will recursively search the current directory for any of the following files:
- All
*.js,*.cjs, and*.mjsfiles in directories calledtest. - All files named “test”. Example:
test.js - All files starting with “test-”. Example:
test-something.cjs - All files ending with “.test”, “-test”, or “_test”: Examples:
something.test.js,something-test.cjs,something_test.mjs
Limiting the Tests
Testing a large code base can sometimes be a time-consuming process. if you want
to limit the test files being run, just pass them as arguments to node --test.
You can also pass globs
to node --test (as of Node.js 21)
instead of a file path. This allows you, for example, to specify all files under a
certain directory: node --test some/path/**/*.test.js.
Alternatively, you can use --test-name-pattern
to filter to just specific tests by regex pattern. For example:
node --test --test-name-pattern="regex \w+"
At the time of writing, it appears that the filtering only works on top-level tests and doesn’t work on subtests. See this GitHub issue for a potential solution in a future release of Node.js.
Within a test file, you can also filter and limit tests using
describe.skip(),
test.skip(),
it.skip(),
describe.only(),
test.only(),
and it.only().
These work just like the
standard describe() and it() functions as detailed above. The key difference
is that the skip variant will not run the test and the only variant will
restrict the Test Runner to only running that test or suite.
Before version 20.2.0 test.skip()
and test.only() were not available. If you prefer using test() over it(),
make sure you are on the latest version of Node.js!
TODO tests
Not ready to implement a test yet, but you know ahead of time what you want to test?
Then use
describe.todo(),
test.todo(),
and it.todo().
These mark the tests as TODO so you can
come back to them later. This can be useful when working on other tests as the
number of TODO tests is printed in the output, reminding you to get back to them.
Before version 20.2.0 test.todo()
was not available. If you prefer using test() over it(), make sure you are on
the latest version of Node.js!
Advertisement
Continue reading below
Test Timeouts
By default, tests will not timeout. So if you want to cut off long-running tests
you can add --test-timeout
to your node --test call. The --test-timeout flag will take the number of
milliseconds that you want to set the timeout to. For example: node --test --test-timeout=3000.
Please be aware that this feature was released in Node.js version 20.11.0.
Hooks
Hooks are a great way to reuse common set up and tear down processes. Hooks come in several different flavors:
before()- Executes a function before a test suitebeforeEach()- Executes a function before each test in a suiteafterEach()- Executes a function after each test in a suiteafter()- Executes a function after a test suite
Each hook takes a function as an argument and evaluates it during the lifecycle
as described above. This will be relative to the describe() block that the hooks
are in. This makes it possible to execute multiple hooks depending if you have nested
describe() blocks.
Example:
const { describe, it, before, beforeEach, afterEach, after } = require('node:test');

describe('some test suite', () => {
  before(() => {
    // Do some one-time set up, like opening a database connection
  });

  beforeEach(() => {
    // Do some set up before each test, like resetting mocks
  });

  afterEach(() => {
    // Do some tear down after each test, like cleaning up the database
  });

  after(() => {
    // Do some one-time tear down, like shutting down a server
  });
});
Mocking
With the integrated test runner there is the ability to mock functions and object methods. Mocking can be a very handy tool, especially when testing error-handling code and external api code.
To get started with mocking, you need to import the mock object from node:test.
Then you can use mock.fn()
to mock a function. The first argument is the original function and the second argument
is an optional implementation. Used without an implementation mock.fn() can be
used to see if a function has been called (a “spy” in other testing frameworks).
Used with an implementation and you can change the behavior of the original function.
The other function to know is mock.method().
mock.method() takes an object as its first argument, with the second being the name
of the method. You can also provide a third argument as a replacement implementation
function. As with mock.fn() having the implementation allows you to change the
behavior and not having the implementation allows you to check if it has been called.
When you are done with a mock you can run mock.restoreAll()
to restore the original functionality and resets the function call history for each mock.
Use this in a beforeEach() or afterEach() hook to reuse mocks across multiple tests.
Example (Modified from the Node.js Docs):
const { test, mock } = require('node:test');
const assert = require('node:assert/strict');

test('spies on an object method', (t) => {
  const number = {
    value: 5,
    subtract(a) {
      return this.value - a;
    },
  };

  mock.method(number, 'subtract');
  assert.equal(number.subtract.mock.calls.length, 0);
  assert.equal(number.subtract(3), 2);
  assert.equal(number.subtract.mock.calls.length, 1);

  const call = number.subtract.mock.calls[0];

  assert.deepEqual(call.arguments, [3]);
  assert.equal(call.result, 2);
  assert.equal(call.error, undefined);
  assert.equal(call.target, undefined);
  assert.equal(call.this, number);
});
Mocking Timers
In addition to mocking function you can also test code that uses setTimeout() and
setInterval(). This feature is stable in v23.1.0,
so make sure you have the latest version!
You need to enable the function you want to mock by calling mock.timers.enable({ apis: ['setTimeout', 'setInterval'] }), then call mock.timers.tick(x) to simulate time passing.
Example (Modified from the Node.js Release Blog Post):
const { test, mock } = require('node:test');
const assert = require('node:assert/strict');

test('mocks setTimeout', () => {
  const fn = mock.fn();
  mock.timers.enable({ apis: ['setTimeout'] });
  setTimeout(fn, 100);

  mock.timers.tick(50);
  mock.timers.tick(50);

  assert.strictEqual(fn.mock.callCount(), 1);
});
Mocking Dates
As of Node.js version 20.11.0,
you can also mock the Date.now() function.
The setup is similar to the timers mock. Enable it by calling: mock.timers.enable({ apis: ['Date'] })
and then mock.timers.setTime(1000). Alternatively, you can enable the mock and
set the value all in one go: mock.timers.enable({ apis: ['Date'], now: 1000 }).
One thing to be aware of when working with both the mock timers and the mock date is
dvancing the time via mock.timers.tick(x) will also advance the time produced
by the mocked Date.now().
Advertisement
Continue reading below
Mocking Modules
As of Node.js version 22.3.0 there is experimental support for mocking modules.
To enable this feature, you must pass the --experimental-test-module-mocks to node.
When this feature becomes more stable this guide will be updated to cover it.
Advertisement
Continue reading below
Test Reporters
When using the Test Runner, by default the tests are reported in a human-readable
way. This is called the spec test reporter.
There are two other test reporters in addition to spec. They are tap, which
prints out a report in the “Test Anything Protocol”, and dot, which prints out
successful tests as a dot and failures with an “x”.
To change between formats use the --test-reporter flag. For example:
node --test --test-reporter dot
There is also the option of creating a custom test reporter. But that is outside of the scope of this blog post.
Watch Mode
If you want to automatically retry a test whenever a file is changed, you can use
watch mode. It is currently experimental in Node.js 20,
but you can use it with the --watch flag. For example: node --test --watch
Watch mode will continue running until you explicitly stop it, using the CTRL + C
keyboard shortcut.
Test Concurrency
As of Node.js 21
you can also specify the maximum number of tests you want to run simultaneously.
The default value is generally the number of CPUs available to your machine
(see os.availableParallelism()
for more details).
To change this from the detected default, pass --test-concurrency to Node
when running the test runner. For example node --test --test-concurrency 4 path/to/tests/**/*.js.
Code Coverage
Another experimental feature (as of Node.js 20) that you can use today, is
code coverage.
Enable it via the --experimental-test-coverage flag. This will print out
a summary of covered after printing the test results. For example:
node --test --experimental-test-coverage
As of Node.js version 20.11.0, there
is a “lcov” reporter
included by default. to use it specify --test-reporter=lcov along with --experimental-test-coverage.
Advertisement
Continue reading below
Code Coverage Thresholds
With the release of version 22.8.0, the code coverage feature, now has the ability to set thresholds for coverage. If the coverage falls below the thresholds then the Node process will exit with an error status (which should cause your CI to fail).
The thresholds can be customized by different types of coverage:
- Branches:
--test-coverage-branches=<threshold percent> - Functions:
--test-coverage-functions=<threshold percent> - Lines:
--test-coverage-lines=<threshold percent>
Command Line Flags
So there a lot of flags available for the test runner, it can get quite cumbersome to specify all of them at once. Thankfully, in Node.js v23.10.0 the Node team introduced a experimental config files. The config files allow you to specify a bunch of different flags in a convenient JSON file.
If you have a file named node.config.json in the root directory of your project, you can run
you tests by using --experimental-default-config-file.
Of if you want to use a different file, you can use --experimental-config-file
and pass the path to a config file.
Here’s an example of what the config file looks like:
{
  "$schema": "https://nodejs.org/dist/v23.10.0/docs/node-config-schema.json",
  "nodeOptions": {
    "test-reporter": "lcov",
    "test-timeout": 3000
  }
}
The commandline flags map 1-1 to the config file options, just drop the -- at
the beginning.
Conclusion
In conclusion, the new stable Test Runner in Node.js 20 is a valuable addition for developers who want to test without much overhead. By following this tutorial, you should now have a solid understanding of how to use the Test Runner to its full potential.
Happy testing!
Further Reading
- Node.js Test Runner Guide (Official)
- Node.js Test Runner docs
- Node.js Test CLI docs
- Node.js Assert docs
- Node.js Mocks docs
- Learn How to Build a Custom Test Reporter Using Node.js’ New Native Test Runner - An article going over test reporters and how to build your own custom reporter.
- Migrating 500+ tests from Mocha to Node.js - How the Astro project migrated their tests from Mocha to the Node.js Test Runner and the benefits they got and tradeoffs they made.
- Using node:test with Typescript